The Complete Design-Build Process: How to Finish Your Basement Without Regrets or Surprises

Published on
December 12, 2025

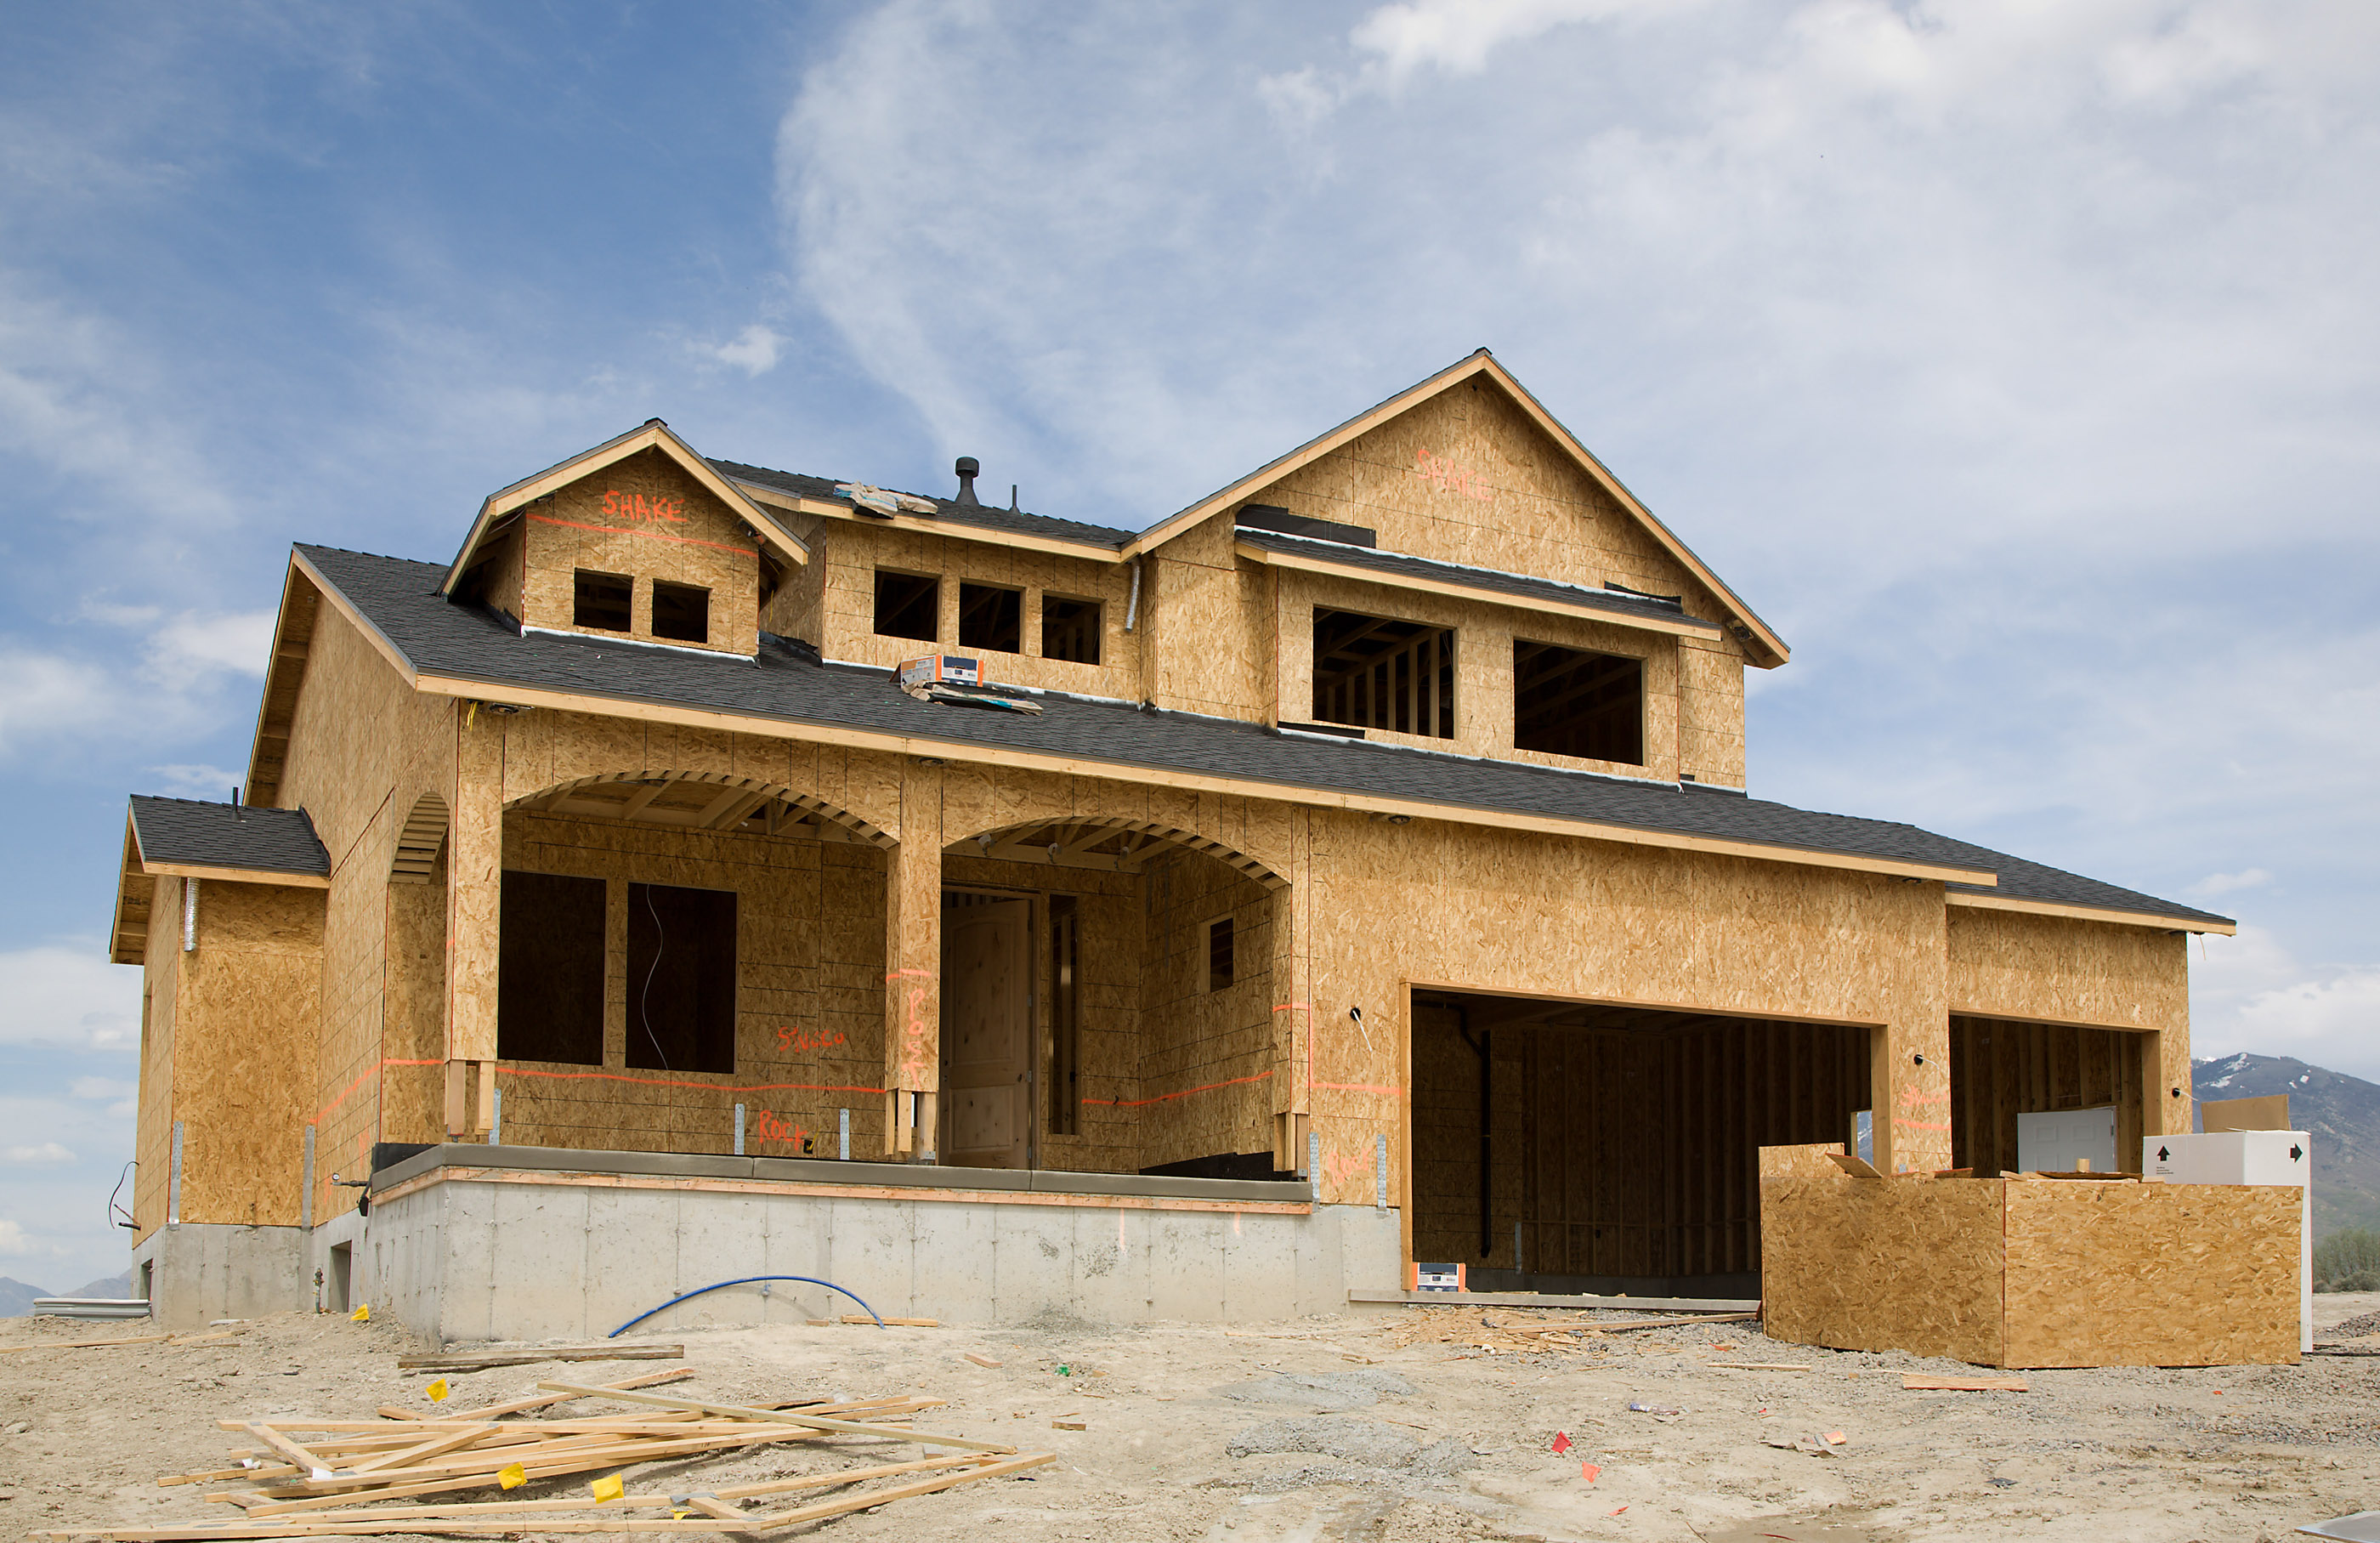
You've decided to finally finish your basement. It's an exciting decision—you're about to unlock hundreds of square feet of valuable living space without the cost and complexity of a home addition.

But here's what keeps many homeowners up at night: Will I regret my design choices? Will costs spiral out of control? Will the contractor disappear mid-project? Will I end up with a "basement-y" basement instead of beautiful living space?

After completing hundreds of basement finishing projects throughout Omaha, Elkhorn, Papillion, and surrounding areas, we've perfected a design-build process that eliminates these fears. This comprehensive process ensures you'll know exactly what your basement will look like, exactly what it will cost, and exactly what to expect—before construction even begins.

In this guide, we'll walk you through every phase of a professional basement finishing process, explain why each step matters, and show you how this approach prevents the regrets and surprises that plague so many basement projects.

What is Design-Build, and Why Does It Matter?

Before diving into the process, let's clarify what "design-build" actually means—and why it's superior to traditional approaches.

Traditional Approach (Design-Bid-Build):In the traditional model, you:

  1. Hire an architect or designer to create plans (separately)
  2. Get bids from multiple contractors based on those plans
  3. Select a contractor (often the lowest bidder)
  4. Hope the contractor interprets the plans correctly
  5. Deal with disputes when contractor and designer disagree
  6. Face change orders when design doesn't match construction reality

Problems with Traditional Approach:

  • Designer doesn't consider construction realities or costs
  • Contractor claims design is unbuildable or overpriced
  • Finger-pointing when problems arise ("bad design" vs. "poor execution")
  • Owner caught in the middle
  • Costs often exceed original estimates significantly

Design-Build Approach: In design-build, a single entity handles both design and construction:

  1. One contract with one company
  2. Designer and builders collaborate from the start
  3. Design considers construction realities and costs
  4. Seamless transition from design to construction
  5. Single point of accountability
  6. Costs known with high accuracy before committing

Benefits of Design-Build:

  • Single Accountability: One company responsible for everything
  • Integrated Process: Design and construction expertise collaborate from day one
  • Cost Accuracy: Builders involved in design can estimate accurately
  • Better Communication: No telephone game between separate companies
  • Faster Timeline: Design and construction overlap strategically
  • Value Engineering: Builders help optimize design for cost without sacrificing quality
  • Fewer Change Orders: Construction realities considered during design

For basement finishing specifically, design-build is particularly valuable because basements present unique challenges that require both design sophistication and construction expertise.

Why Most Basement Projects Fail (And How Design-Build Prevents It)

Before explaining our process, let's identify why basement projects so often lead to regrets:

Common Basement Project Failures:

1. Rushed Design Leads to Functional Problems Homeowners sketch layouts on napkins, contractors build what's drawn, and the family discovers too late that the furniture doesn't fit, the TV placement is wrong, or the bathroom is in an awkward location.

Design-Build Solution: Comprehensive design phase with professional designers who understand how families actually use spaces.

2. Budget Surprises Derail Projects Contractors give vague estimates with large "allowances," then actual costs exceed estimates by $20,000-$50,000, leaving projects incomplete or heavily compromised.

Design-Build Solution: Detailed budgeting after complete design and material selections—you know exact costs before committing.

3. Poor Material Choices Create Problems Homeowners select beautiful materials that aren't appropriate for basements—hardwood that warps, carpet that mildews, finishes that don't match home's style.

Design-Build Solution: Professional designers guide material selections appropriate for basement environments and your home's aesthetic.

4. Contractors Disappear or Do Shoddy Work Horror stories abound of contractors taking deposits and disappearing, or delivering work so poor it must be redone.

Design-Build Solution: Work with established design-build contractors with portfolios, references, and accountability.

5. Permit and Code Problems Many basement projects aren't properly permitted or don't meet code, creating problems during home sales and safety issues.

Design-Build Solution: Professional contractors handle all permitting and ensure full code compliance.

6. No Professional Design Leadership Homeowners make design decisions they later regret because no one provided professional guidance.

Design-Build Solution: Designers provide leadership, offering professional opinions about what works and what doesn't.

Our design-build process specifically addresses each of these failure points. Let's walk through it step by step.

Phase 1: Initial Consultation (Free)

Your basement finishing journey begins with a conversation—and it costs you nothing.

What Happens During Initial Consultation:

We Visit Your Home: We come to you at a time that's convenient. There's no pressure, no obligation—just a conversation about possibilities.

We See Your Basement: Walking through your actual basement lets us assess:

  • Current condition and layout
  • Ceiling height and mechanical obstacles
  • Natural light opportunities (windows, egress potential)
  • Moisture or structural concerns
  • Existing electrical, plumbing, and HVAC systems
  • Access and staging areas for construction

We Discuss Your Vision: We ask questions to understand:

  • How will you use this space? (Family room? Home theater? Bedrooms? Game room? Bar? All of the above?)
  • Who will use it? (Kids? Teens? Adults? Guests? Multi-generational?)
  • What's your timeline? (ASAP? Planning for next year?)
  • What's your approximate budget? (This isn't binding—just establishing ballpark)
  • What examples have you seen that you like?
  • What's driving this project now? (Family growth? Working from home? Kids need play space?)

We Identify Initial Considerations: Based on what we see and hear, we might identify:

  • Moisture issues that need addressing
  • Structural limitations or opportunities
  • Potential egress window locations for bedrooms
  • Rough square footage potential
  • Mechanical relocation possibilities
  • Rough ballpark budget ranges

We Explain Our Process: We walk through our complete design-build process (what you're reading now), explain timelines, and answer your questions.

We Assess Fit: Not every client is right for every contractor. We're looking to see:

  • Are your expectations realistic for your budget?
  • Is your timeline achievable?
  • Do your needs match our expertise?
  • Is our process appealing to you?

You're assessing us too:

  • Do you feel comfortable with our communication style?
  • Does our portfolio match your aesthetic?
  • Do you trust our expertise?
  • Does our process give you confidence?

What This Consultation Costs: Nothing. We offer initial consultations free because we want you to make informed decisions. Even if you choose a different contractor or decide not to proceed, you'll leave with valuable information about your basement's potential.

What Happens Next: If we're a mutual good fit and you'd like to proceed, we'll schedule the next phase: the design agreement.

You can see examples of our completed basement work, including our basement finishing project in La Vista and our 1,400 sq ft basement remodel in Logan, IA.

Phase 2: Design Agreement and Discovery ($2,000-$4,500)

This is where the magic happens—and where our process differs dramatically from contractors who rush straight to construction.

What is the Design Agreement?

The design agreement is a limited-scope contract covering the design phase only. You're not yet committing to construction—you're investing in thorough planning that will prevent regrets and surprises later.

Design Agreement Investment: $2,000-$4,500

Why the range? Design complexity varies:

  • Smaller, simpler basements (800-1,200 sq ft, basic layout): Lower end
  • Larger or complex basements (1,400+ sq ft, multiple rooms, bathrooms): Higher end
  • Unique challenges (structural modifications, complex mechanical coordination): Higher end

What This Investment Includes:

1. Comprehensive Lifestyle Discovery

Our designers don't just draw rectangles on paper. They conduct detailed discovery interviews to understand how you actually live:

Questions We Ask:

  • About Daily Routines: When and how will you use this space? Morning, evening, weekends?
  • About Family Dynamics: Who spends time where? Do kids play together or separately? Where do teens want to hang out?
  • About Furniture: What existing furniture will go down here? What do you plan to purchase? Do you have specific pieces we need to design around?
  • About Technology: What TV/media equipment? Gaming systems? Computer setup? Home automation preferences?
  • About Entertaining: Will you host gatherings? How many people? What style (casual/formal)?
  • About Activities: Exercise equipment? Home theater? Bar? Pool table? Craft space? Home office?
  • About Future Needs: How might your needs change in 5-10 years? Kids growing? Aging parents moving in? Home business?
  • About Aesthetics: What styles do you love? What do you hate? Do you have Pinterest boards or examples?
  • About Priorities: What's most important? (Bang for buck? Specific features? Quality finishes? Speed?)

This discovery prevents us from designing a basement that looks beautiful in drawings but doesn't function for your actual life.

2. Professional Space Planning

With lifestyle understanding established, our designers create detailed floor plans showing:

Layout Options: We typically provide 1-2 layout options exploring different approaches:

  • Different room configurations
  • Furniture placement (to scale)
  • Traffic flow patterns
  • Door swings and clearances
  • Natural light utilization

Detailed Dimensions: Every room sized appropriately for its function:

  • Can the sectional sofa fit with walking space?
  • Is the bedroom large enough for a queen bed and nightstands?
  • Does the bathroom have enough room for comfortable use?
  • Will there be clearance around the pool table?

Mechanical Integration: How do we work around (or relocate):

  • Ductwork and HVAC equipment
  • Plumbing lines
  • Electrical panels
  • Water heaters and other utilities
  • Structural posts and beams

Ceiling Height Strategy:

  • Where can we maximize height?
  • Where do we need soffits for mechanicals?
  • Should we consider open ceilings in any areas?

Storage Solutions:

  • Built-in storage locations
  • Closet configurations
  • Utility/mechanical room access
  • Seasonal storage areas

3. 3D Renderings and Visualization

Floor plans are helpful, but most people struggle to visualize spaces from two-dimensional drawings. That's why we create 3D renderings showing:

What You'll See:

  • Photorealistic views of key spaces
  • Different angles of main areas
  • Material and color representations
  • Lighting effects
  • Furniture in place

Why This Matters:3D renderings let you "see" your basement before it's built. You can identify issues like:

  • "That wall should have more windows"
  • "The TV is too far from the seating"
  • "I don't like how that color looks in this space"
  • "The room feels too closed off"

Making these discoveries in 3D costs nothing. Making them during construction costs thousands.

4. Preliminary Material Selections

During design, we help you select general material directions:

Material Categories:

  • Flooring type and style (LVP, tile, carpet, etc.)
  • Wall treatments (paint colors, accent walls, etc.)
  • Ceiling approach (drywall, open, combination)
  • Trim style and color
  • Lighting style and approach
  • General fixture and hardware styles

These aren't final selections yet (that comes in Phase 3), but they inform the design and help refine budget estimates.

5. Engineering and Code Review

Our architects/engineers review the design for:

  • Structural requirements (are modifications needed?)
  • Egress window requirements (if bedrooms planned)
  • Building code compliance
  • HVAC capacity and zoning needs
  • Electrical service capacity
  • Plumbing rough-in locations

This technical review catches potential problems before construction, when they're easy and inexpensive to address.

6. Budget Refinement

After design development, we provide a refined budget estimate that's far more accurate than the initial ballpark:

Budget Breakdown by Category:

  • Framing and drywall
  • Electrical work
  • Plumbing (if applicable)
  • HVAC modifications
  • Flooring
  • Trim and millwork
  • Painting
  • Fixtures and hardware
  • Permits and fees

Accuracy Level: At this stage, the budget is typically within 15-30% of final costs—much more accurate than initial estimates, but not yet exact because final material selections haven't been made.

What You Can Expect: If the initial ballpark was "$60,000-$80,000," the design-phase estimate might be "$68,000-$77,000 depending on final selections."

7. Timeline Projection

We provide realistic timeline expectations:

  • Design completion time
  • Permit processing time
  • Material lead times
  • Construction duration
  • Anticipated completion date

The Design Agreement Deliverables:

At the end of the design agreement phase, you receive:

  • Detailed floor plans with dimensions
  • 3D renderings of key spaces
  • Preliminary material selections
  • Refined budget estimate
  • Timeline projection
  • Initial construction documents

The Decision Point:

With these deliverables in hand, you can make an informed decision:

Option 1: Proceed to Final Planning and Construction If you love the design and the budget works, we move to Phase 3—finalizing all details and creating your construction contract.

Option 2: Pause or Adjust If timing isn't right or budget needs adjustment, you can:

  • Save the plans for future execution
  • Adjust scope and redesign with those changes
  • Take plans elsewhere (you own them)

Option 3: Choose Not to Proceed If you decide basement finishing isn't right for you after all, you've invested $2,000-$4,500 rather than committing to a full project you'd regret.

Why This Investment is Worth It:

The design agreement investment prevents:

  • Change orders during construction ($5,000-$20,000+ in typical basement projects)
  • Living with design regrets (priceless—or requires expensive remodeling)
  • Budget surprises that leave projects incomplete
  • Functionality problems that reduce how you use the space

In our experience, clients who invest in thorough design save 2-5 times the design cost by avoiding problems.

You can see more about our design approach on our about page.

Phase 3: Final Design, Selections, and Detailed Budget

You've approved the design direction from Phase 2. Now we finalize every detail so you know exactly what you're getting and exactly what it costs.

What Happens in Phase 3:

1. Final Material Selections

We guide you through selecting specific materials in every category:

Flooring Selections:

  • Exact LVP product, color, and brand
  • Specific tile selections with grout colors
  • Carpet type, style, color, and padding
  • Transitions and trim pieces

Paint and Wall Finishes:

  • Exact paint colors for all walls and ceilings
  • Accent wall treatments (if any)
  • Sheen levels (flat, eggshell, satin)

Trim and Millwork:

  • Baseboard style and height
  • Door and window casing styles
  • Crown molding (if any)
  • Built-in details
  • Hardware and hinges

Lighting:

  • Specific recessed light models and quantities
  • Pendant lights or chandeliers
  • Sconces and accent lighting
  • Switches and dimmers
  • Smart home integration

Plumbing Fixtures (if applicable):

  • Vanities and countertops
  • Faucets and hardware
  • Toilets and accessories
  • Shower/tub fixtures
  • Tile and waterproofing

Electrical:

  • Outlet and switch locations
  • Cable/data port locations
  • Dedicated circuits for equipment
  • Ceiling fan locations
  • Special electrical needs

HVAC:

  • Register locations
  • Return air placements
  • Thermostat locations
  • Zoning strategy

Doors and Hardware:

  • Door styles and materials
  • Hardware finish and style
  • Closet door types

2. Design Guidance and Trade-Off Discussions

This is where professional design leadership is invaluable. We help you navigate:

Quality Tier Decisions: For each category, there are good/better/best options at different price points. We explain:

  • What you gain spending more
  • What compromises you make spending less
  • Where it's worth investing
  • Where you can save without regret

Example Conversation: "For basement flooring, you're considering luxury vinyl plank. You could spend $3.50/sq ft for good quality LVP that looks nice and performs well, or $6.50/sq ft for premium LVP with superior wear layer and ultra-realistic wood appearance. For 1,200 sq ft, that's a $3,600 difference. In a basement where kids will play, the mid-tier option might be smarter, saving that $3,600 for better lighting or built-in storage that adds more long-term value."

Aesthetic Cohesion: We ensure your basement selections harmonize with:

  • Your home's existing style
  • Upstairs finishes and flow
  • Current design trends (for resale value)
  • Your personal aesthetic preferences

Functionality Checks: We verify every selection works for your intended use:

  • Is that carpet appropriate for high-traffic areas?
  • Will that paint color look good with basement lighting?
  • Are tile selections slip-resistant for the bathroom?
  • Will that hardware style be easy for kids to use?

3. Detailed Construction Documents

With selections finalized, we create comprehensive construction documents including:

Architectural Drawings:

  • Dimensioned floor plans
  • Electrical plans
  • Plumbing plans (if applicable)
  • Ceiling plans showing heights and transitions
  • Elevation drawings showing built-ins and details
  • Cross-sections for complex areas

Specifications:

  • Material specifications for every item
  • Installation methods and standards
  • Brand names and model numbers
  • Color numbers and finishes
  • Quantities and coverage rates

Permit Documents:

  • Everything needed for building department approval
  • Structural calculations (if required)
  • Energy compliance documentation

4. Precise Budget with Line-Item Costs

Now we can provide an exact budget:

Sample Budget Format:

DEMOLITION & PREPARATION
- Demolition and disposal: $2,400
- Moisture barrier installation: $1,800

FRAMING & DRYWALL
- Framing materials and labor: $8,500
- Drywall materials and finishing: $7,200
- Ceiling work and soffits: $3,100

ELECTRICAL
- Rough-in wiring and boxes: $4,800
- Fixtures and devices: $2,200
- Panel upgrades (if needed): $1,500

PLUMBING (if applicable)
- Rough-in plumbing: $3,500
- Fixtures and finish: $2,800

HVAC
- Ductwork modifications: $2,400
- Additional registers and returns: $800

FLOORING
- LVP in main areas (950 sq ft @ $5.50): $5,225
- Carpet in bedrooms (400 sq ft @ $4.50): $1,800
- Tile in bathroom (60 sq ft @ $8.50): $510

PAINTING
- Wall and ceiling painting: $4,200
- Trim painting: $1,600

TRIM & MILLWORK
- Baseboard and casing: $2,800
- Doors and hardware: $1,900
- Built-in shelving: $2,400

MISCELLANEOUS
- Permits and fees: $800
- Materials contingency (3%): $1,750

SUBTOTAL: $63,485
CONTRACTOR FEE & OVERHEAD: $12,697
TOTAL PROJECT COST: $76,182

What This Budget Includes:

  • Every material specified
  • All labor for installation
  • Permits and inspections
  • Project management
  • Waste disposal
  • Site protection and cleanup
  • Warranty

What This Budget Doesn't Include: We're transparent about what's not included:

  • Furniture and décor
  • Window treatments
  • Future upgrades or additions
  • Repairs to existing home issues discovered during construction

Budget Confidence: At this stage, the budget is 95%+ accurate. The only variables are:

  • Unknown conditions discovered during demolition
  • Client-requested changes during construction
  • Material price changes (if construction is delayed significantly)

5. Construction Timeline

We provide a detailed timeline:

  • Week 1-2: Demolition and rough framing
  • Week 3: Electrical and plumbing rough-in
  • Week 4: Inspections and HVAC work
  • Week 5-6: Drywall installation and finishing
  • Week 7: Painting
  • Week 8: Flooring installation
  • Week 9: Trim and millwork
  • Week 10: Final fixtures, hardware, and punch list
  • Week 11: Final inspection and completion

Actual timelines vary based on project scope and complexity. This timeline helps you plan around construction.

6. The Construction Contract

With everything finalized, we prepare your construction contract including:

  • Complete scope of work
  • Final budget (line-item breakdown)
  • Payment schedule
  • Timeline with milestones
  • Change order procedures
  • Warranty terms
  • Insurance and permits
  • Communication protocols

Payment Schedule Example: Most basement projects use a payment schedule like:

  • 15% deposit upon contract signing
  • 25% after rough-in completion
  • 25% after drywall completion
  • 25% after finishes installed
  • 10% upon final completion and approval

This protects both parties—you don't pay too much upfront, and we have necessary funds for materials and labor as work progresses.

The Go/No-Go Decision:

With complete plans, exact budget, and detailed contract, you make the final decision:

Proceed with Construction: Sign the contract, make your deposit, and we schedule your start date.

Adjust and Refine: If budget is higher than comfortable, we can value-engineer to reduce costs while maintaining functionality.

Postpone: If timing isn't right, you have complete plans ready when you're ready to proceed.

This decision point gives you complete confidence before committing to construction. You know exactly what you're getting, exactly what it costs, and exactly what to expect.

Phase 4: Construction and Project Management

Plans are finalized, contracts are signed, and it's time to build your new basement spaces.

What Happens During Construction:

Pre-Construction Meeting: Before work begins, we meet to:

  • Review the final plans together
  • Confirm material selections
  • Discuss construction process and expectations
  • Establish communication preferences
  • Review site access and working hours
  • Discuss any household considerations (pets, kids, security)

Week-by-Week Construction:

Week 1-2: Demolition and Preparation

  • Protect existing areas with dust barriers
  • Remove any existing finishes
  • Address any moisture issues
  • Install vapor barriers
  • Begin rough framing

What to Expect:

  • Noise and dust (despite our best containment efforts)
  • Workers arriving 7:30-8:00 AM
  • Dumpster on-site
  • Disruption to basement access

Communication:

  • Daily text updates on progress
  • Photos of work completed
  • Heads up about next day's activities

Week 3: Mechanical Rough-Ins

  • Electrical wiring and boxes
  • Plumbing rough-in (if applicable)
  • HVAC ductwork modifications
  • Window installations (if egress windows)

What to Expect:

  • Different trade contractors on-site
  • Coordinated scheduling
  • Possible brief utility interruptions (scheduled in advance)

Communication:

  • Updates on trade completion
  • Photos of rough-in work
  • Scheduling for inspections

Week 4: Inspections

  • Building department rough-in inspections
  • Corrections if needed
  • Insulation installation

What to Expect:

  • Possible brief delays waiting for inspector
  • Quick corrections if inspection notes issued
  • Quiet period during inspection days

Communication:

  • Inspection scheduling notice
  • Results and any correction needs
  • Next phase start date

Week 5-6: Drywall

  • Drywall installation
  • Taping and mudding
  • Texture application (if desired)
  • Sanding

What to Expect:

  • Fine dust despite containment
  • Noticeable progress as walls go up
  • Spaces starting to take shape

Communication:

  • Progress updates as rooms are completed
  • Notice before sanding (dustiest phase)
  • Reminder to keep doors closed upstairs

Week 7: Painting

  • Primer application
  • Paint application (usually 2 coats)
  • Detail work and touch-ups

What to Expect:

  • Paint smell (we use low-VOC paints)
  • Ventilation needs
  • Spaces really starting to look finished

Communication:

  • Color confirmation before application
  • Notice about ventilation needs
  • Touch-up opportunity at the end

Week 8: Flooring

  • Subfloor preparation
  • Flooring installation
  • Transitions and trim pieces

What to Expect:

  • No access to areas being floored
  • Different procedures for different floor types
  • Dramatic visual transformation

Communication:

  • Daily updates on which rooms completed
  • Care instructions for new floors
  • When spaces can be accessed

Week 9: Trim and Millwork

  • Baseboard installation
  • Door hanging and hardware
  • Built-in construction
  • Final carpentry details

What to Expect:

  • Precision work taking time
  • Nail guns (noise)
  • Rooms looking nearly complete

Communication:

  • Progress through trim schedule
  • Hardware installation confirmation
  • Approaching completion timeline

Week 10: Final Fixtures and Details

  • Light fixture installation
  • Plumbing fixture installation (if applicable)
  • Outlet and switch cover plates
  • Hardware and accessories
  • Final touch-ups

What to Expect:

  • Shorter work days
  • Final details coming together
  • Punch list development

Communication:

  • Walkthrough scheduling
  • Punch list discussion
  • Final completion timeline

Week 11: Final Inspection and Completion

  • Final building inspection
  • Our internal quality inspection
  • Punch list completion
  • Final walkthrough with you
  • Certificate of occupancy (if required)

What to Expect:

  • Final cleanup and debris removal
  • Walkthrough with you to confirm satisfaction
  • Any minor corrections completed
  • Warranty documentation provided

Throughout Construction: Our Commitments

Professional Project Management:

  • Daily job site supervision
  • Trade coordination and scheduling
  • Material ordering and delivery
  • Problem-solving and decision-making
  • Quality control checks

Proactive Communication:

  • Regular text/email updates
  • Photos of progress
  • Immediate notification of any issues or delays
  • Responsiveness to your questions
  • Weekly check-in calls (if desired)

Site Cleanliness:

  • Daily cleanup and organization
  • Dust containment measures
  • Debris removal
  • Respect for your home
  • Final deep cleaning

Quality Workmanship:

  • Experienced, professional trade partners
  • Work done to code and beyond
  • Attention to detail
  • Solutions-oriented approach
  • Pride in craftsmanship

Issue Resolution: Construction inevitably involves some unexpected challenges. When they arise:

  • We notify you immediately
  • We explain the issue clearly
  • We present solution options
  • We provide cost/timeline impacts
  • We wait for your decision before proceeding

Example Issues and How We Handle Them:

Scenario: Concrete floor has more slope than anticipated

  • Discovery: During floor prep, we measure and discover a 2-inch slope across the basement
  • Notification: We call you immediately with photos showing the issue
  • Options Presented:
    • Option A: Level floor with self-leveling compound ($1,800, adds 2 days)
    • Option B: Adjust baseboard height to accommodate (no cost, minor visual impact)
    • Option C: Build up low side with subfloor system ($3,200, adds 4 days)
  • Your Decision: You choose Option A
  • Execution: We order materials, adjust schedule, complete leveling, continue with original timeline afterward

Scenario: Old wiring behind walls is unsafe

  • Discovery: During demolition, we find old knob-and-tube wiring
  • Notification: We stop work, call you with explanation and photos
  • Options Presented:
    • Option A: Reroute circuits to avoid old wiring ($800, adds 1 day)
    • Option B: Replace entire circuit back to panel ($1,400, adds 2 days but eliminates all old wiring)
  • Your Decision: You choose Option B for long-term safety
  • Execution: Licensed electrician replaces circuit, inspected and approved, work continues

We never proceed with changes without your approval. While these situations add cost, they're handled transparently with clear communication.

Change Orders:

If you decide to make changes during construction:

  • We discuss feasibility and implications
  • We provide cost and timeline impacts
  • We document changes in writing
  • We obtain your written approval
  • We adjust schedule and budget accordingly

Example Change Order:

Change: You decide to add a wet bar that wasn't in original plans

  • We price the addition: $8,500 for plumbing, cabinetry, sink, and finishes
  • Timeline impact: Adds 1.5 weeks to schedule
  • We document in change order form
  • You sign approval
  • We proceed with addition

Our goal is to minimize change orders through thorough planning (Phases 1-3), but we accommodate reasonable changes professionally when they occur.

Phase 5: Final Walkthrough and Warranty

Construction is complete. Now we ensure you're completely satisfied.

The Final Walkthrough:

We schedule a comprehensive walkthrough where:

Room-by-Room Review: We visit every space together, checking:

  • All finishes installed correctly
  • Paint quality and coverage
  • Flooring installation
  • Trim and millwork details
  • Fixtures and hardware operation
  • Lighting function
  • Plumbing operation (if applicable)
  • Doors and windows
  • Electrical outlets and switches
  • Overall quality and cleanliness

Punch List Creation: If we identify any items needing attention:

  • Minor touch-ups
  • Small corrections
  • Final adjustments

We document everything and commit to completion timelines (typically 1-3 days for minor items).

System Operation Review: We show you:

  • How to operate new systems
  • Thermostat settings for new zone
  • Lighting controls or dimmers
  • Any special features or built-ins
  • Maintenance requirements

Documentation Provided:

  • Warranty information
  • Paint colors and product information
  • Flooring care instructions
  • Fixture and hardware specifications
  • Permits and inspection certificates
  • As-built drawings (if changes were made)
  • Contact information for future needs

Punch List Completion:

Within days, we return to complete any punch list items, then schedule a final confirmation visit to ensure your complete satisfaction.

Your Satisfaction is Required:

We don't ask for final payment until you're completely satisfied. If something isn't right, we correct it—period.

Warranty Coverage:

We provide comprehensive warranty:

One-Year Workmanship Warranty: We warranty our workmanship for one year from completion. If installation issues arise from our work, we correct them at no cost.

What's Covered:

  • Installation defects
  • Finish failures due to improper application
  • Trim or millwork issues
  • Paint adhesion problems
  • Floor installation problems
  • Any defect resulting from our workmanship

What's Not Covered:

  • Normal wear and tear
  • Damage from misuse or abuse
  • Issues from materials (covered by manufacturer warranties)
  • Changes made by others after completion
  • Acts of nature (flooding, etc.)

Manufacturer Warranties: Products installed carry their own warranties:

  • Flooring typically 15-25 years
  • Paint usually 15-25 years
  • Fixtures per manufacturer (varies)
  • Appliances per manufacturer

We provide all manufacturer warranty information and assist with claims if needed.

How to Request Warranty Service:

If issues arise:

  1. Contact us with description and photos
  2. We assess whether issue is warranty-covered
  3. We schedule service visit
  4. We correct the problem
  5. We follow up to ensure satisfaction

Post-Project Support:

Even after warranty expires, we remain available for:

  • Questions about your basement
  • Recommendations for future updates
  • Referrals for other work
  • General support as your contractor

We build long-term relationships, not one-time transactions.

Why This Process Eliminates Regrets and Surprises

Let's review how each phase prevents common basement finishing problems:

Problem: Rushed design leads to functional spaces that don't work

Solution: Phase 2's comprehensive lifestyle discovery and professional space planning ensures spaces function perfectly for how you actually live.

Problem: Budget surprises and cost overruns

Solution: Phase 3's detailed selections and line-item budgeting means you know exact costs before committing to construction.

Problem: Poor material choices

Solution: Phase 2 and 3's professional design guidance ensures materials are appropriate for basements and match your aesthetic.

Problem: Contractor disappears or delivers poor work

Solution: Working with established design-build contractor with portfolio, references, and professional project management.

Problem: Code violations and permit issues

Solution: Proper permitting and inspections handled professionally throughout process.

Problem: Design regrets after completion

Solution: 3D renderings in Phase 2 let you see and adjust design before construction begins.

Problem: Living with unfinished project

Solution: Complete budgeting prevents running out of money mid-project.

Problem: Surprise moisture problems

Solution: Phase 1 identifies moisture issues; Phase 4 addresses them properly before finishing.

Our process specifically addresses every common failure point. The result: basements our clients love for decades.

Investment Summary: What Does This Process Cost?

Phase 1: Initial Consultation Investment: Free

Phase 2: Design Agreement Investment: $2,000-$4,500 Deliverables: Floor plans, 3D renderings, preliminary selections, refined budget

Phase 3: Final Planning Investment: Included in construction contract Deliverables: Final selections, construction documents, exact budget, contract

Phase 4: Construction Investment: $45,000-$125,000+ depending on scope, size, and finishes Deliverables: Completed basement finishing to exact specifications

Phase 5: Warranty Investment: Included Deliverables: One-year workmanship warranty, ongoing support

Total Investment Examples:

Basic Basement Finish (900 sq ft):

  • Design: $2,500
  • Construction: $52,000
  • Total: $54,500

Mid-Range Basement (1,200 sq ft with bathroom):

  • Design: $3,200
  • Construction: $78,000
  • Total: $81,200

High-End Basement (1,500 sq ft, bathroom, wet bar, premium finishes):

  • Design: $4,200
  • Construction: $118,000
  • Total: $122,200

The design investment (2-4% of total project cost) prevents problems that would cost far more to correct.

Real Client Experience: What to Expect Timeline-Wise

**Total Timeline from Start to Finish: 3-5 Months**

  • Month 1: Initial consultation, design agreement signed, design phase
  • Month 2: Design finalized, selections completed, contract signed
  • Month 3-4: Construction (8-11 weeks)
  • Month 4-5: Final completion, walkthrough, move in

Factors That Extend Timeline:

  • Client decision-making time (we can only move as fast as you're ready)
  • Material lead times for specialty selections
  • Permit processing delays
  • Discovery of unexpected issues requiring corrections
  • Weather (if egress windows require exterior work)
  • Holiday periods

Factors That Speed Timeline:

  • Clear decision-making and responsiveness
  • Readily available materials
  • No unexpected issues discovered
  • Efficient permit processing

We communicate expected timelines clearly and update you on any changes.

Frequently Asked Questions

Q: Do I have to use your design services, or can I provide my own plans? A: We require design involvement for basement projects. We've found that construction-only arrangements lead to problems when plans don't consider construction realities. However, if you have preliminary plans or ideas, we'll incorporate them into our design process.

Q: What if I find the design phase and I decide my budget doesn't work? A: That's exactly why we have a design agreement phase—to discover this before committing to full construction. You'll have plans you can save for when budget allows, or we can value-engineer to reduce costs while maintaining functionality.

Q: Can I do some of the work myself to save money? A: We generally don't recommend this for several reasons: (1) It creates warranty complications (what's our work vs. yours?), (2) It disrupts scheduling, (3) It can void permits if you're not licensed for certain trades. However, you could handle post-construction tasks like painting or decorating.

Q: How much of a mess will construction create in the rest of my house? A: We use dust containment systems and daily cleanup to minimize impact. Some dust migration is inevitable during demolition and drywall sanding, but we work hard to contain it. Most clients report less mess than expected.

Q: What if we discover problems during demolition? A: We notify you immediately, explain the issue clearly, present options with cost/timeline impacts, and wait for your decision before proceeding. We handle surprises transparently and professionally.

Q: Do you work on weekends? A: Standard construction is Monday-Friday, typically 7:30 AM - 4:30 PM. We can sometimes accommodate weekend work for specific situations, but prefer not to for our crews' work-life balance.

Q: How much mess and noise should I expect? A: Demolition (Week 1-2) is noisiest and dustiest. Drywall sanding (Week 5-6) creates fine dust. Most other phases have moderate noise during work hours. We communicate loudest/dustiest days in advance so you can plan accordingly.

Q: What happens if I'm not satisfied with something? A: Tell us immediately. We'll assess the concern, determine if it's within scope or a change request, and address it promptly. Our goal is your complete satisfaction.

Q: Can I make changes during construction? A: Yes, though changes are easier and less expensive early in the process. We'll price any changes as change orders, obtain your written approval, and adjust schedule and budget accordingly.

Ready to Start Your Basement Finishing Journey?

If you're considering finishing your basement in Omaha, Elkhorn, Papillion, Bellevue, or surrounding areas, our design-build process ensures you'll love the results for decades to come.

Next Steps:

  1. Schedule your free consultation: Contact us to discuss your basement finishing goals
  2. Browse basement inspiration: Explore basement remodeling considerations
  3. Review completed basement projects: See our portfolio including projects like our large basement remodel in Nebraska City and small basement remodel in North Omaha
  4. Learn about our services: Discover more about our basement finishing services
  5. Read client experiences: See what homeowners say about our process on our reviews page
  6. Learn about avoiding mistakes: Read our guide to 8 basement finishing mistakes (link to Blog 2 when published)

Your basement can become the space your family uses and loves most—where memories are made, where guests want to gather, and where functionality meets beauty. Our design-build process makes that happen without the regrets and surprises that plague so many basement projects.

Let's create a basement you'll love for decades to come.

Davis Contracting LLC specializes in design-build basement finishing throughout the Omaha metro area. Our comprehensive process eliminates common basement finishing mistakes and creates beautiful, functional spaces perfectly suited to your lifestyle. Learn more about our design-build approach.

Omaha: Schedule a Design Consultation

Ready to take a step with your custom home, remodel or addition in the Omaha region?You'll love our process.

Get a Design Consultation

IDEA Gallery

No items found.

8 Basement Finishing Mistakes Omaha Homeowners Regret (And How to Avoid Them)

Avoid common basement finishing errors by preventing these frequent mistakes.

Home Addition Ideas for Omaha Homes: 15 Ways to Add Space Without Moving

Keep your existing home by adding space with a home addition.

The Complete Design-Build Process: How to Finish Your Basement Without Regrets or Surprises

When planning to finish your Omaha basement, check out our complete process at Davis Contracting.

Custom Home Builder vs. Production Builder: Which is Right for Your Omaha Build?

When choosing between a custom home builder or production builder for your Omaha home, consider these factors.

Home Addition Cost Guide: What to Expect for Your Omaha Home in 2026

Are you considering a home addition to your Omaha house? Consider these cost estimates.

Best Basement Remodelers in Omaha, NE

Give your home a new look and feel with basement remodeling services. Check out the top basement finishers near Omaha.